Button Making Tutorial
Making Buttons is Easy!
Our step-by-step button making tutorial will show you how:Step 1: Place the button components in the Pickup Die (left) and the Crimp Die (right).

Step 2: Rotate the Pickup Die clockwise until it is underneath the Upper Die.
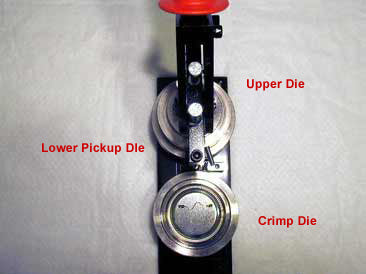
Step 3: Pull the handle down, easily crimping the shell, graphic, and mylar in the Upper Die.

Step 4: The button components are now in the Upper Die.
Raise the handle and rotate the Crimp Die counter-clockwise.

Step 5: With the pin back still in the Crimp Die...

pull the handle a second time.

Step 6: Rotate the die clockwise to see your finished button!

That's it, that's all there is to making buttons!
It's that easy with American Button Machines!

Need help designing buttons?
Download FREE Button Making Templates
Or
Use Build-a-Button software and never need them again!