Button Making Questions - Ask ABM, Common Crimping Issues Solved

One of the most common button making questions is, "Why are my buttons coming apart" or "Why is there mylar not tucked in on the side of my button?" The first thought is usually that the machine is broken or the parts are defective but it is extremely rare that either of these are the case. In this edition of Ask ABM, we are taking a look at the many things that can cause these common concerns and how to fix them!
One of the most common causes is that your paper is too thick or too thin. We recommend using standard 24 pound copier paper in most all of our machines. We have a great guide for all of our button makers available in our Button Blog called Three Steps for Picking the Right Paper for Button Making. Using the wrong paper or trying to use card stock will absolutely keep the button from completely pressing together and you end up with a button that comes apart or mylar that doesn't tuck so be sure you follow the guide for perfect buttons!
 Next on the list, how are you cutting the graphics for your button? Your graphic has to be cut exact and even. It should not be bigger than the mylar and the edges need to be nice and even. It sounds easy to cut them out with scissors when you just need a few but this is one of the biggest mistakes new button makers make. Investing in a quality cutter that is specifically designed for button making will make your button making life so much easier! You can see all of the available options in our video tutorial, Choosing a Paper Cutter for Button Making.
Laser printers provide beautiful, crisp images but they can also cause mylar to slip when you punch your button together, especially if you have a full bleed in your design. Toner from laser printers contain wax and even if you have made 100 perfect buttons, the printer can decide to dump a little extra wax on that page and suddenly your buttons won't work. To determine if this is causing your issue, try making a button with plain paper. If it works, the toner is causing the problem. This doesn't mean you have to throw away all of those beautifully, already printed graphics. A silicone stick used on the tapered edge of the crimp die will normally solve the problem. If you haven't printed all of your buttons yet or don't have time to get the silicone stick, decreasing your bleed by .125" will be just as effective.
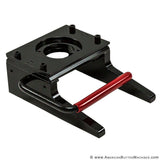
Sometimes even the most seasoned button making pro can pick up 2 shells and when that happens, you either have a jam, which this video can help you solve, or the next button will not crimp together. To check the upper die for any extra parts, put your finger in the middle of the upper pick up die. If you do not feel a hole, something is stuck up inside the die and you need to get it out. To do this you need to turn the crimp die (the die that you would normally put your pinback in), under the pickup die with nothing in it and pull the handle down about halfway and then lift up. Your button pieces should have fallen out into the crimp die. Try it again if it did not come out pulling your handle down just a little bit more each time until it falls out.

If you try each of the solutions above and are still having concerns, you can always give us a call. We are happy to help! Should you need help outside of business hours, join our Facebook group, The Pinback Button Making Community. There you can ask questions, share ideas and make new button-y friends 24 hours a day! The best and brightest in the button making world are there and ready to help any time. We hope to see you there but until then, happy button making!
By Brighid Brown, Director of Blogging and All Things Cool at ABM
Share this post
2 comments


Thank you for reaching out Delux Production. Please contact our Customer Solutions Team for assistance troubleshooting your machine. We are always happy to help!
Troubleshooting. My machine is scraping because the top part is loose. Need to know how to tighten the upper handle part so that the top and bottom does not scrap as it turns.