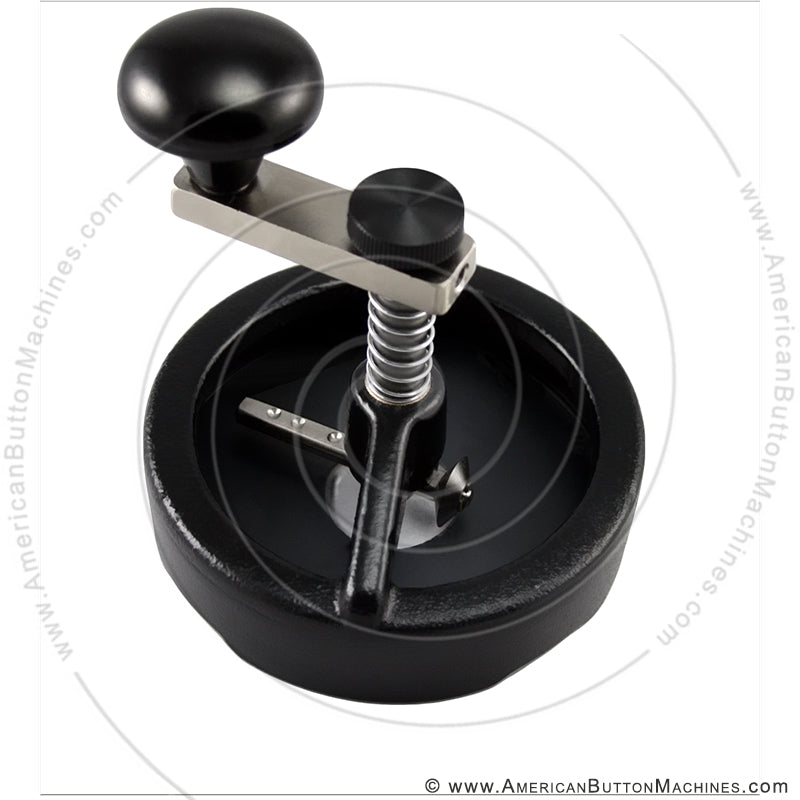
How to Change the Cutting Blade on an Adjustable Circle Cutter
Hey Button Makers. We occasionally have callers who ask how to change the blade on their Adjustable Circle Cutter. It’s actually very simple, but we’ve put together this step-by-step tutorial to guide you through the process. You will need a small, flat-head screwdriver and a pair of needle nosed pliers. If you organize anything like me, the screwdriver is in the drawer to the left of the fridge and the pliers are in the garage. We’ll wait while you look for them….
Okay, ready now?
The first thing you want to do is remove the plastic Centering Template from the Circle Cutter.
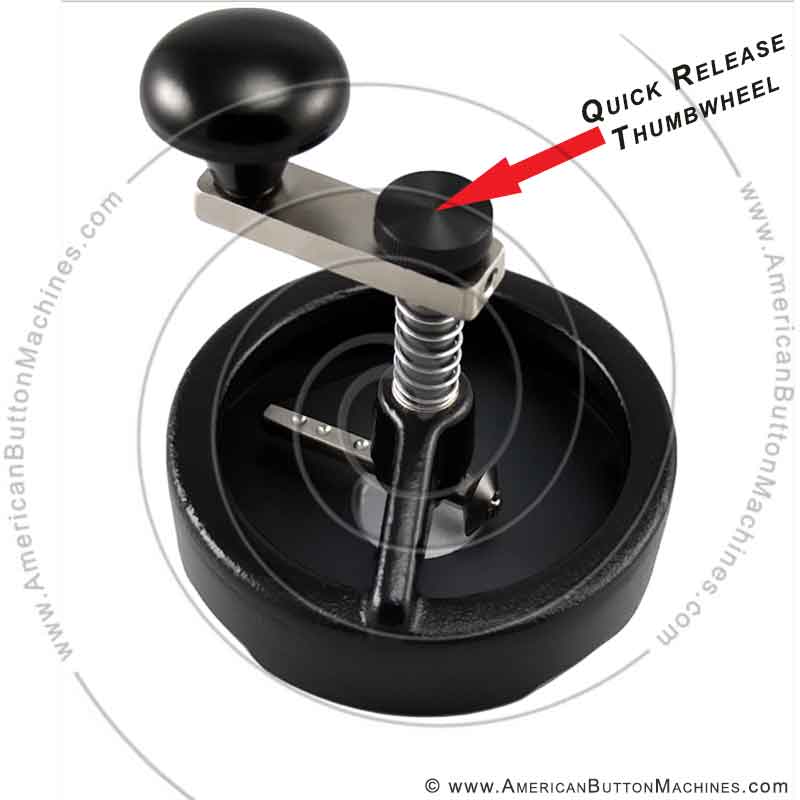
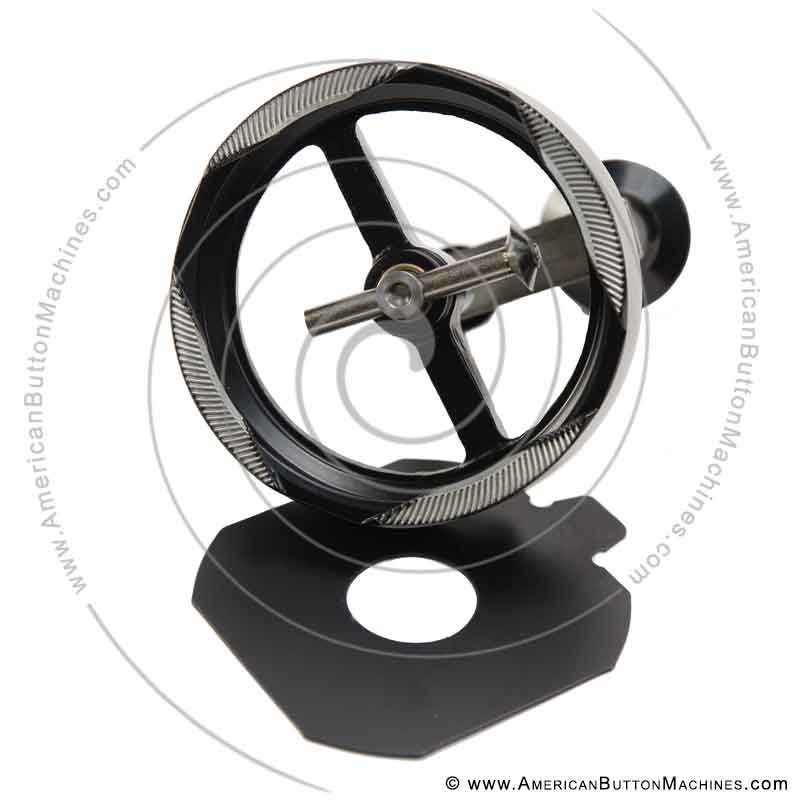 Next, remove the black thumbwheel and turn the circle cutter upside down.
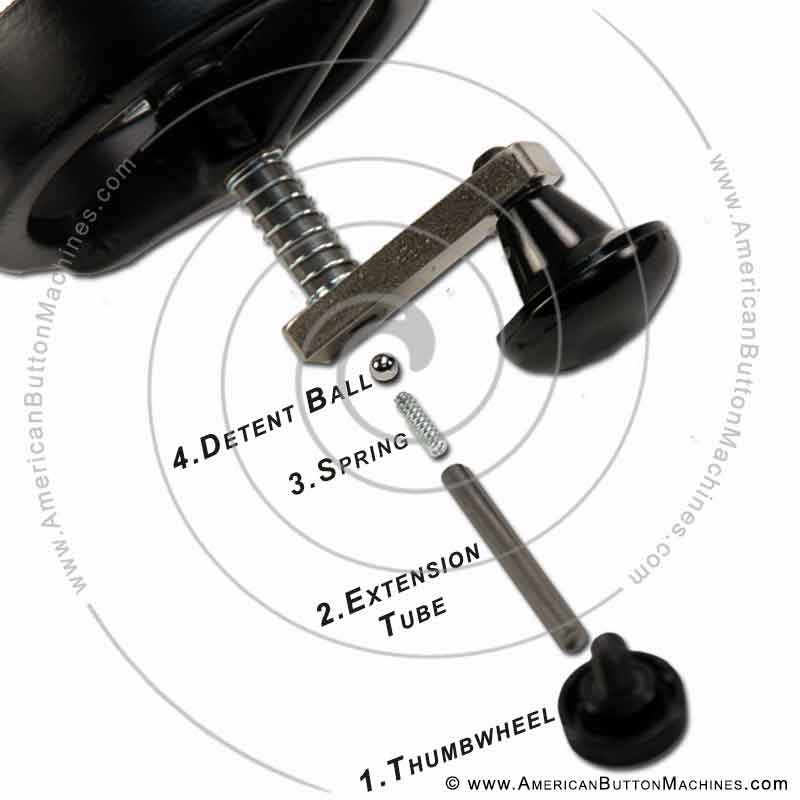
 Slowly remove the extension tube, spring and detent ball from the crankshaft.
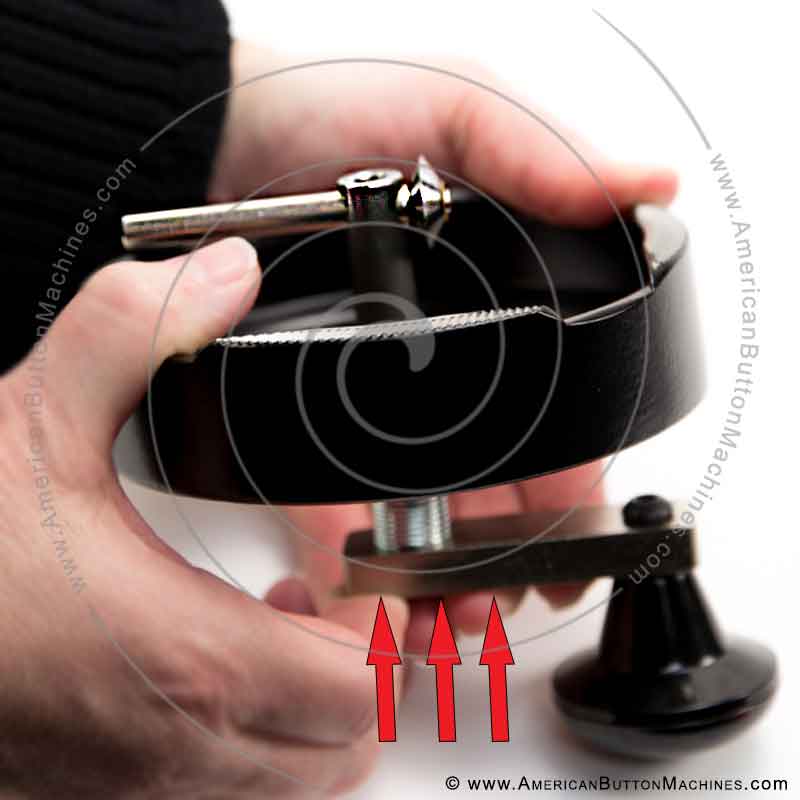
 While holding the cutter upside down, compress the top and bottom together.
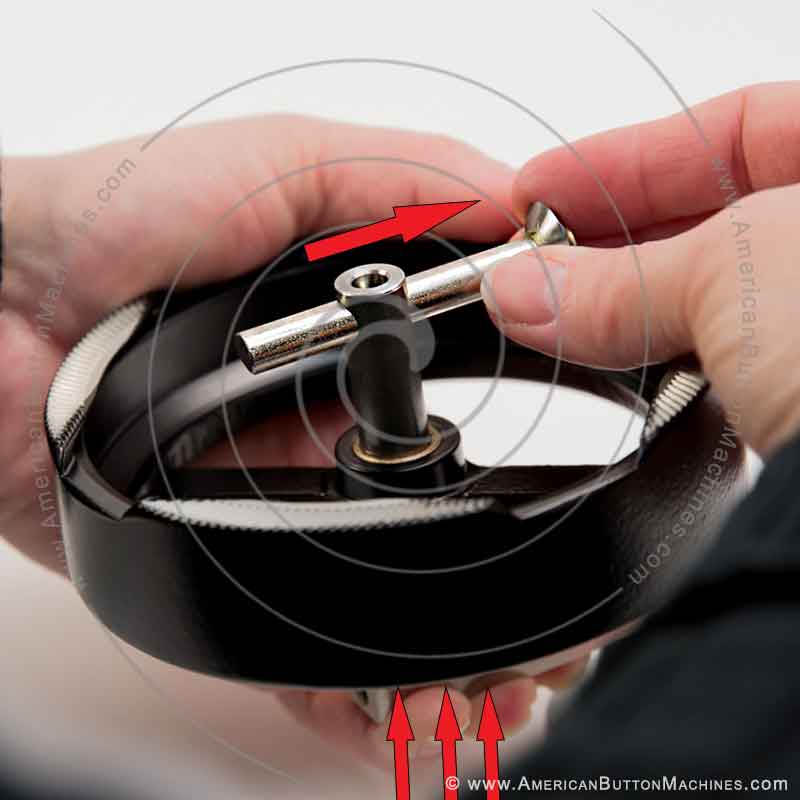 While compressing, pull the cutting shaft out and set it aside.
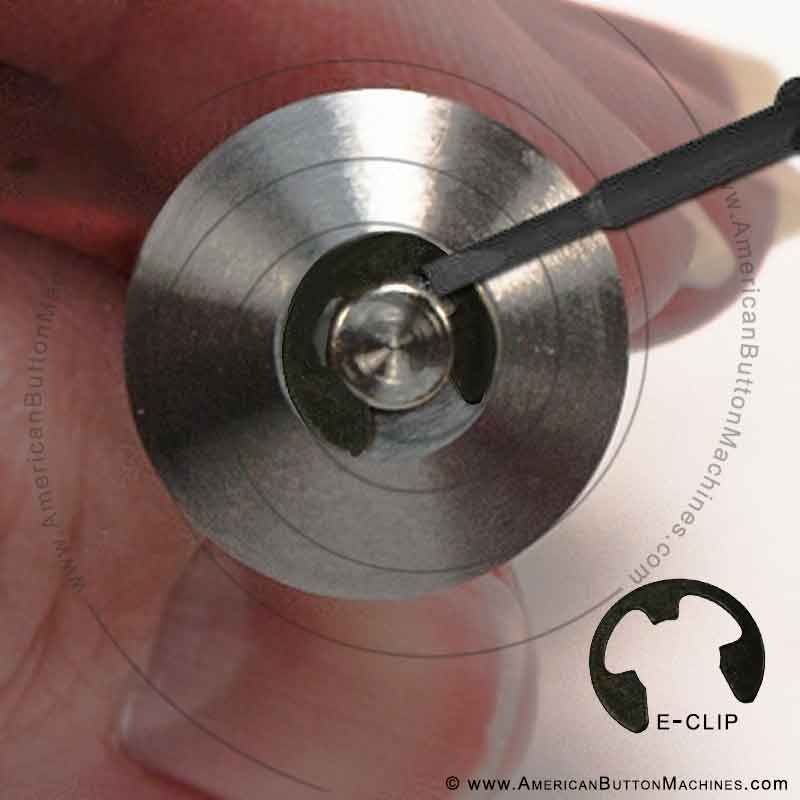
 Next, remove the E-clip by placing the tip of a small flat head screwdriver between the open space of the E-clip and the cutting shaft. Gently rotate the screwdriver and pry the E-clip from the Cutting Wheel. Then remove the cutting wheel from the cutting shaft. Hot Tip: Cover the E-clip with your other hand so it does not accidentally pop off and shoot across the room.
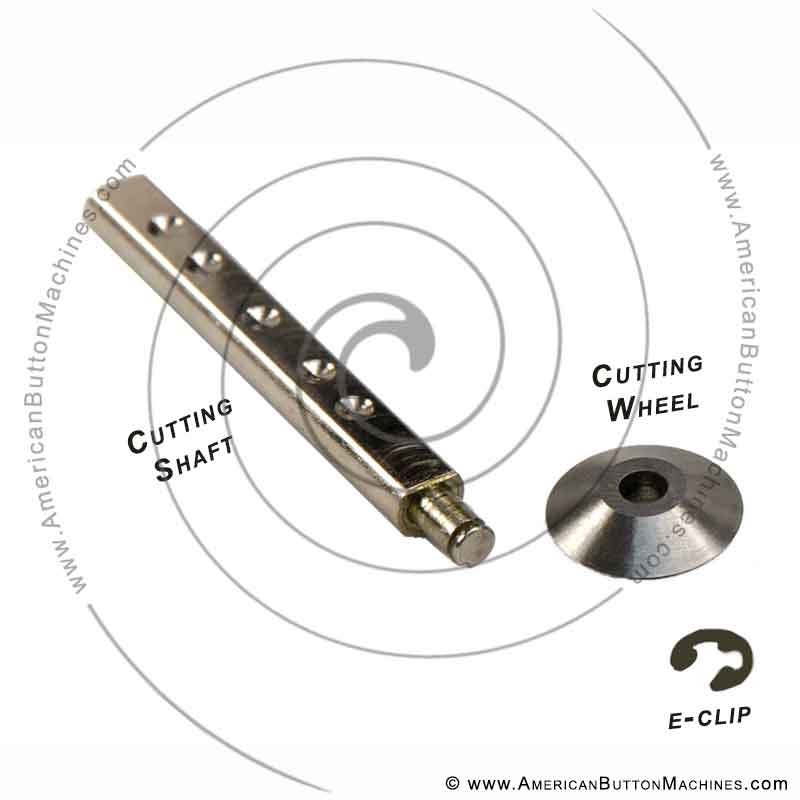
 The image below shows a disassembled cutting shaft assembly.
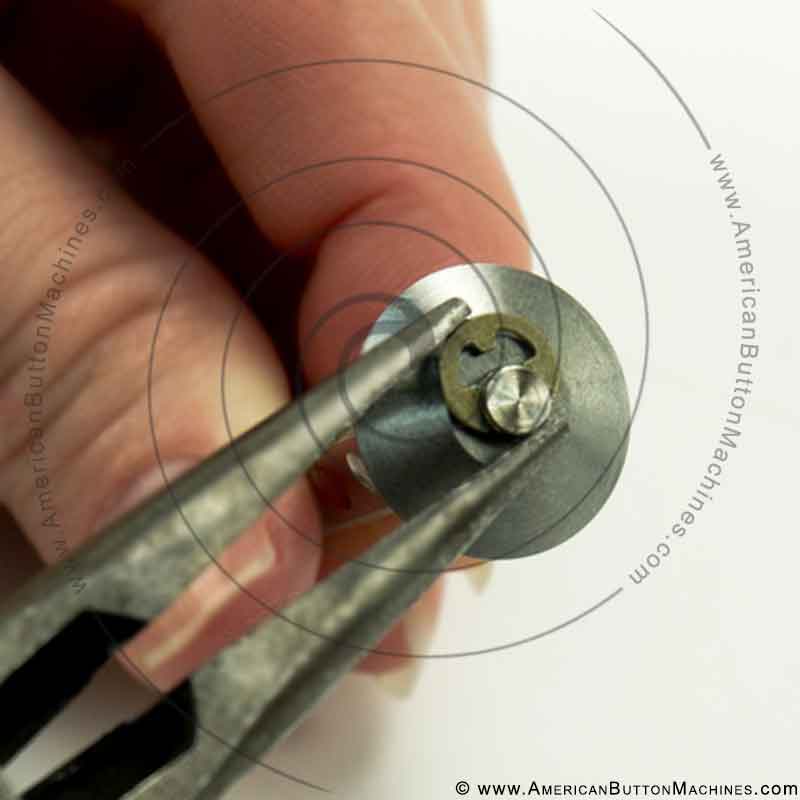
 Next, place the new cutting wheel on the cutting shaft and snap the E-clip back in place using a pair of needle-nose pliers.
 To reassemble your Circle Cutter, simply reverse step-by-step the process and you are ready to start cutting graphics again!
 I hope this tutorial took the mystery out of replacing the cutting wheel on our adjustable circle cutter. If you have any questions, please call us or send an email and one of our friendly sales staff will be happy to assist you.
Until next time, Happy Button Making!
 By Brighid Brown, Director of Blogging and All Things Cool at ABM
 Next, remove the black thumbwheel and turn the circle cutter upside down.
 Slowly remove the extension tube, spring and detent ball from the crankshaft.
 While holding the cutter upside down, compress the top and bottom together.
 While compressing, pull the cutting shaft out and set it aside.
 Next, remove the E-clip by placing the tip of a small flat head screwdriver between the open space of the E-clip and the cutting shaft. Gently rotate the screwdriver and pry the E-clip from the Cutting Wheel. Then remove the cutting wheel from the cutting shaft. Hot Tip: Cover the E-clip with your other hand so it does not accidentally pop off and shoot across the room.
 The image below shows a disassembled cutting shaft assembly.
 Next, place the new cutting wheel on the cutting shaft and snap the E-clip back in place using a pair of needle-nose pliers.
 To reassemble your Circle Cutter, simply reverse step-by-step the process and you are ready to start cutting graphics again!
 I hope this tutorial took the mystery out of replacing the cutting wheel on our adjustable circle cutter. If you have any questions, please call us or send an email and one of our friendly sales staff will be happy to assist you.
Until next time, Happy Button Making!
 By Brighid Brown, Director of Blogging and All Things Cool at ABM
Share this post
0 comment
