ABM Video Series: How to Make Versa-Back Buttons
It is with tearful eyes and a plaintive heart that I come to you today. You may be wondering, why? How could one be immersed in the wonderful world of buttons and yet filled with and overwhelming sense of sadness? Well I will tell you: we have now reached the end of our ABM Video Series. I realize that we all wanted the joy and inspiration of the video series to go on forever; but alas, as they say, all good things must come to an end. So let's all compose ourselves and give our full, undivided attention to the latest and great, the last but not the least, the fun final finale...yes, ladies and gentleman, the versa-back button. More specifically, how to make one. By now you know the drill. The video is embedded below and we have taken the liberty of also including step-by-step directions for you to follow. All of our machines and suggested procedures are simple and easy to follow, but we leave nothing to chance or to the imagination. So enjoy embarking on your final journey in the ABM Video Series. We shall miss her once she's gone, but just remember that you can always visit her again with this link.  Step-by-step Instructions for Making a Versa-Back Button:
 Step-by-step Instructions for Making a Versa-Back Button:
- Get an appropriately-sized button machine from American Button Machines.
- Slap yourself on the forehead if you were considering a different step for #1.
- Insert the front shell graphic and mylar.
- Rotate the dies of the button machine.
- Insert the collet back.
- Pull the button machine lever down once.
- Rotate the dies again.
- Pull the button machine lever yet again.
- Simply snap in the plastic-tabbed versa-back.
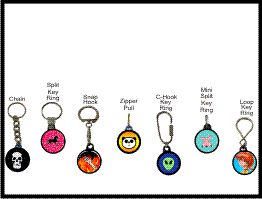
- And here's the fun part: add any of the versa-back options you wish! (Options include: key ring; split key ring; loop key ring; snap hook key ring; chain key ring; and C-hook key ring.)
Video: How to Make Versa-Back Buttons
[lyte id="xi3xkNRmjG8" /]Share this post
0 comment
